Since I’ve done this countless times, I thought it would be helpful to braindump this topic here. I understand that there are many ways—often easier ones—to install the NVIDIA driver on an Ubuntu PC or server. This tutorial is aimed more at developers, especially those training their own AI models, who need the latest available driver on a headless Ubuntu server.
Purge It, Baby!
Before we begin, it’s important to remove any existing or outdated NVIDIA drivers from your server. Let’s get started by connecting to your server via SSH.
ssh user@yourserverip#Purge NVIDIA Driver
sudo apt-get purge nvidia*At this stage, I also recommend removing the NVIDIA APT sources. Since a new kernel might be installed during this process, it’s a good idea to reboot your server to ensure everything starts fresh.
sudo reboot now Install Kernel Headers
After the reboot, you can SSH into your system again. Make sure to check if the kernel headers are installed, and if not, install them.
First, we need to verify if GCC is installed.
gcc --versionIf not, you can install it with the following command:
sudo apt update
sudo apt install gcc
Now, you can install or check for the kernel headers:
sudo apt-get install linux-headers-$(uname -r)Install the Driver
Now we can proceed by adding the NVIDIA APT sources using a convenient APT package. Run the following commands to set it up:
Network Repository Installation for Ubuntu
#DO NOT RUN - READ NEXT
wget https://developer.download.nvidia.com/compute/cuda/repos/$distro/$arch/cuda-keyring_1.1-1_all.deb
Replace REPOS & ARCH with Your Flavor
Make sure to replace $distro and $arch with the appropriate values for your setup. Here’s a quick reference for the available options:
ubuntu2004/sbsa
ubuntu2004/x86_64
ubuntu2204/sbsa
ubuntu2204/x86_64
ubuntu2404/sbsa
ubuntu2404/x86_64
Most likely, for this tutorial, the correct values will be ubuntu2404/x86_64. Here’s the final set of commands to use:
#RUN THIS FOR UBT 24.04 - x86/64
  wget https://developer.download.nvidia.com/compute/cuda/repos/ubuntu2404/x86_64/cuda-keyring_1.1-1_all.deb
After you’ve pulled it, you can now install it:
sudo dpkg -i cuda-keyring_1.1-1_all.debThis file will now add the APT sources to your sources directory. The next logical step is to update the package list:
sudo apt-get updateOnce this is successful, you can now install the new NVIDIA driver:
sudo apt-get install cuda-driversThis is the Proprietary Kernel Modul!
Once this is done, please go ahead and reboot your server.
sudo reboot now Check the Driver
After your system has rebooted, reconnect via SSH and verify that the driver is working as expected.
nvidia-smiHere’s what you should expect:
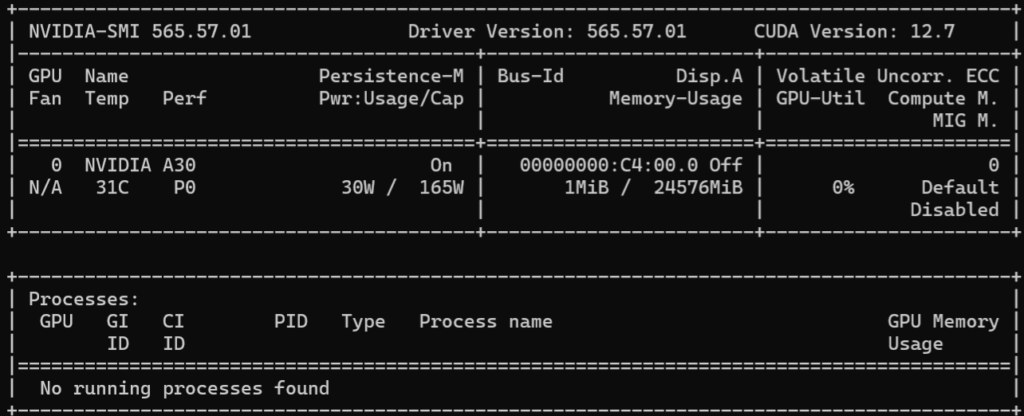
Well done! You now have the latest NVIDIA driver running on your headless Ubuntu server.
Let’s Double-Check
There’s nothing more painful than losing the driver after a system update. To prevent this, we can ensure DKMS is available and properly configured:
dkms statusThis is what you should see:
nvidia/565.57.01, 6.8.0-1016-oracle, x86_64: installedLink to the official NVIDIA documentation:
1. Introduction — NVIDIA Driver Installation Guide r560 documentation
Disclaimer
This tutorial is provided as-is without any guarantees. While every effort has been made to ensure accuracy, I cannot be held responsible for any issues, damage, or data loss resulting from following these instructions. Proceed at your own risk, and always back up your system before making significant changes.
Schreibe einen Kommentar